INSTALL » История » Версия 33
« Предыдущее -
Версия 33/45
(Разница(diff)) -
Следующее » -
Текущая версия
Dmitry Chernyak, 15.12.2016 23:35
INSTALL
- INSTALL
- Get the ISO image
- Burn the ISO-image on the disk or prepare a bootable flash-drive
- Minimal System Requirements
- Nodes setup
- Установить время
- Сконфигурировать бэкбон (межсерверное соединение)
- Инициализировать кластер
- Создать управляющую виртуальную машину.
- Поздравляем! В вашем кластере создана первая виртуальная машина!
- Операции
- Custom build ISO-image
- Burn the ISO image
- Create bootable USB flash
- Minimal System Requirements
- Install the system
- Automatic post-installation changes
- The cluster is ready to setup
OVERVIEW | INSTALL | SETUP | OPERATIONS | LICENSE
ОБЗОР | УСТАНОВКА | НАСТРОЙКА | ОПЕРАЦИИ | ЛИЦЕНЗИЯ
Get the ISO image
Download the distribution disk, ready to install: Download ISO-image
To access it you should register
Burn the ISO-image on the disk or prepare a bootable flash-drive
You can burn the ISO-image using writeable CD-ROM and any available program for burning disks.
You can prepare a bootable flash-drive. For this use any available tool, for example, unetbootin.
When it will ask for "type of a system", you should set Debian of version ... and set the path to the ISO-image file.
You can also th write ISO-image directly to flash-drive:
dd if=/path/to/iso of=/dev/sdX bs=4k
Where /dev/sdX - path to the block device file. which is pointing to a flash.
(To find which block device you need, insert the flash-drive and run "dmesg" in terminal - at the tail of the output you will see the information about the flash-drive plugged in).
.
Minimal System Requirements
In real case you must choose hardware in according to real objectives.For testing purposes minimal system requierements is:
- 2 GB RAM
- 50GB HDD
- 1Gbit ethernet for DRBD link (if you setup 2 or more nodes)
- Hardware Virtualization support: Intel VT or AMD CPU (if you want to run the Windows instances)
For enterprise use both nodes mush have the same configuration (CPU power, RAM, volume and speed of disk system).
Nodes setup
Before setting up, link nodes to LAN with a cable.
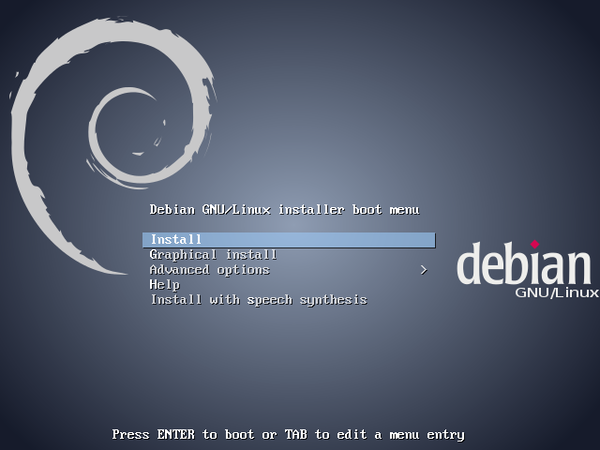
Next boot the first node from installation image.
During the installation process:
Setup the LAN connection
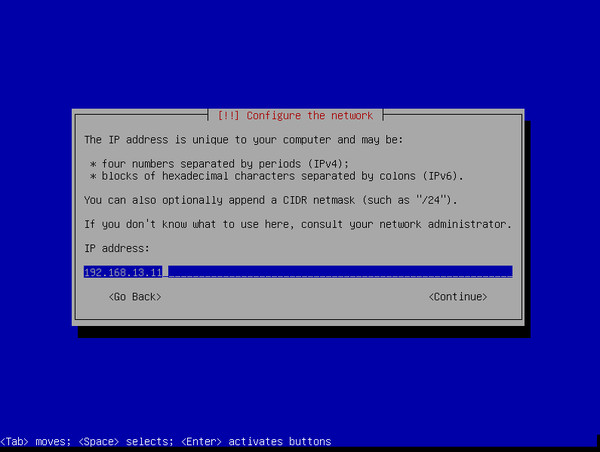
Specify a static IP address for the LAN connection

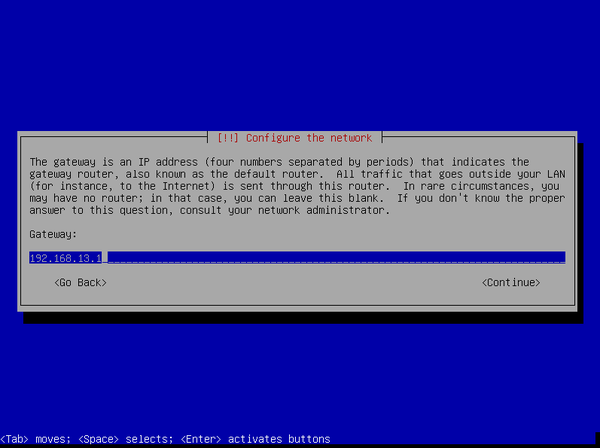
Next specify the network mask, gateway and DNS-server for this connection.
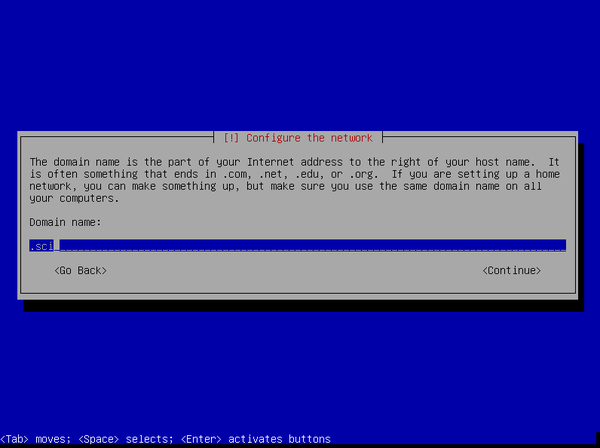
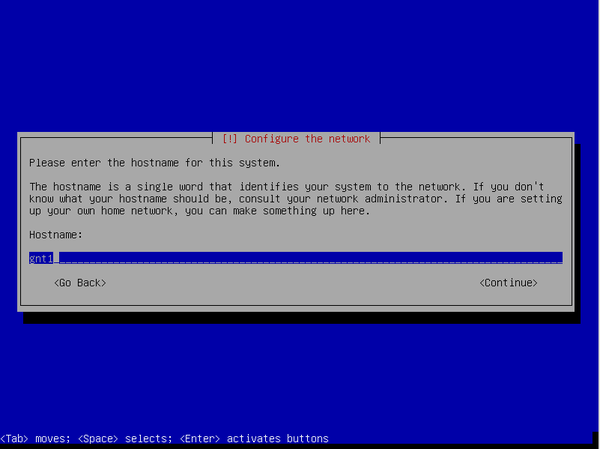
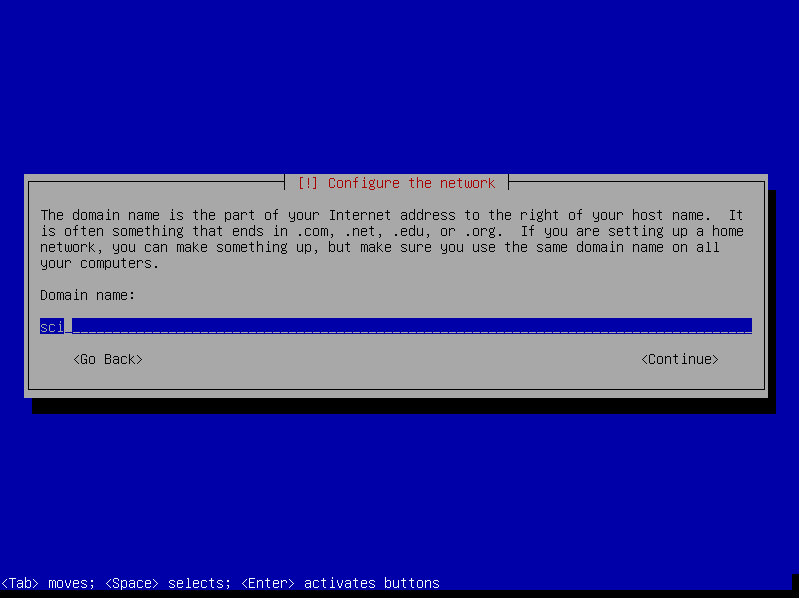
Specify the node's name
In the Hostname field specify the node's name, for examlpe: gnt1 or gnt-1.
"1" means this will be the first node of a cluster.

Specify LAN domain in the Domain field

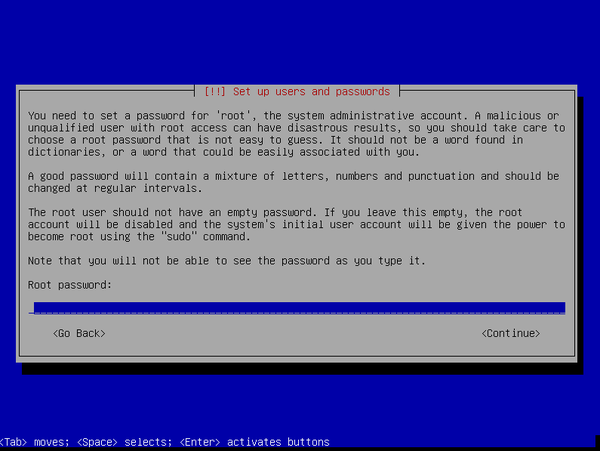
Specify root password
Do not use too weak password!
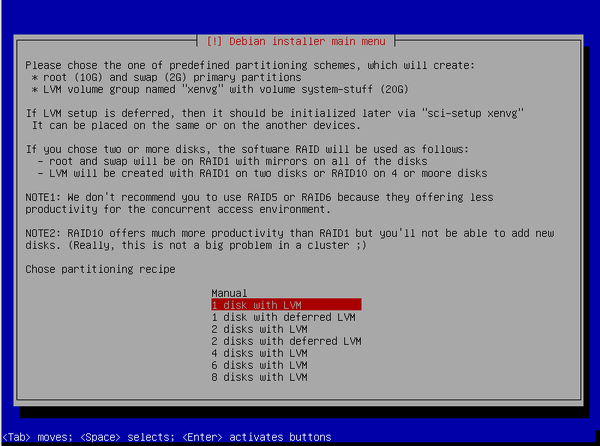
Do a disk partitioning
The installer will present several types of automatic partitioning.
If you want to use Software RAIDЕ, choose
2(4,6,8) disk with lvm - in relation to number of hard disks.
For two disks RAID1 will be used, for more disks RAID10 will be used.
RAID10 - the recommended RAID level to use along with virtualization.
If you use hardware RAID, choose
1 disk with lvm
If you have a server with two types of disks, for example, 2 SATA drives and 8 SAS drives (bare or under hardware RAID), we suggesting to do a initial setup at whole on the SATA drives with "*2 disk with lvm*" template, and after initialization of a cluster, add SAS disks manually as additional LVM VG.
This procedure is described in OPERATIONS.

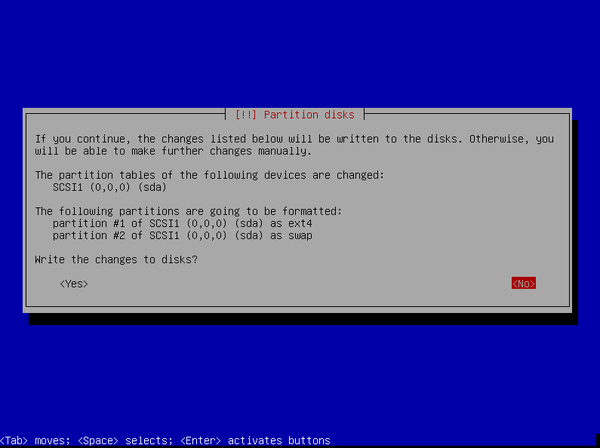
If you encounter the questions about deleting the old partitions and abut a RAID creation, then confirm this.
Инструкции по этой операции и другие подробности - в разделе Разметка диска.
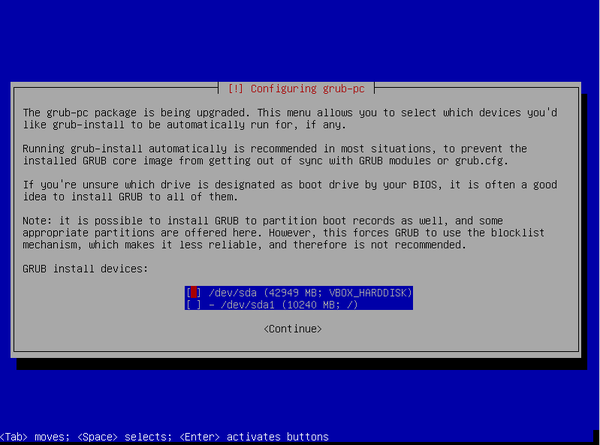
Указать диск для установки загрузчика grub.
Отметьте все физические диски (не раздел, и не том software RAID!), на которые установлена система.

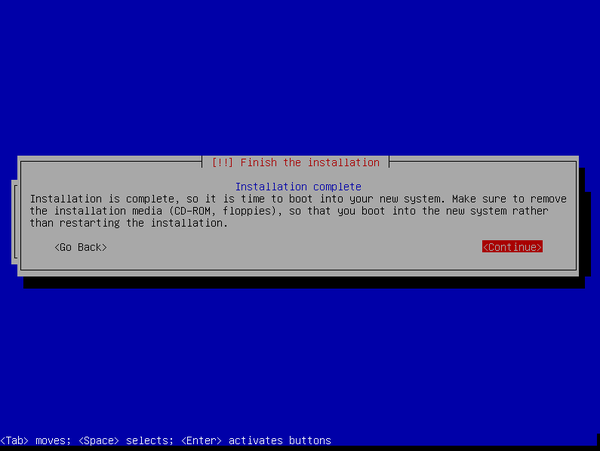
Завершить установку - перезагрузиться.
Аналогично установить второй узел
Задать имя узла, например gnt2 или gnt-2 (сообразно с первым узлом).
Пароль установить такой же, как на первый сервер.
Установить время
Удостоверьтесь, что на обоих узлах установлено одинаковое время.
# date
Thu Mar 12 12:23:10 MSK 2015
Если нет - установите его командой
# date -s "12 MAR 2015 12:23:00"
Сконфигурировать бэкбон (межсерверное соединение)
Не отключайте узлы от LAN.
Соедините узлы вторым кабелем через свободные гигабитные сетевые карты, проверьте, что на них зажглись лампочки link (при наличии лампочек).
Данное подключение будет использоваться для межсерверного соединения, по которому будут синхронизироваться данные на дисках.
Если в сервера подключены еще какие-то ethernet кабели, то их следует отключить на время настройки бэкбона.
После появления линка на каждом узле запустите (можно параллельно, можно последовательно):
sci-setup backbone
Результат:
root@gnt-1:~# sci-setup backbone
Node number: 1
LAN interface: eth0
Waiting 30 seconds for links to be up
Backbone interface: eth3
Up and test backbone

Waiting for backbone to get ready (MAXWAIT is 2 seconds).
          inet addr:10.101.200.11  Bcast:10.101.200.255  Mask:255.255.255.0
ok.
После настройки обоих узлов проверьте соединение. На первом узле запустите:
ping 10.100.200.12
root@gnt-1:~# ping 10.101.200.12
PING 10.101.200.12 (10.101.200.12) 56(84) bytes of data.
64 bytes from 10.101.200.12: icmp_req=1 ttl=64 time=0.263 ms
64 bytes from 10.101.200.12: icmp_req=2 ttl=64 time=0.112 ms
^C
--- 10.101.200.12 ping statistics ---
2 packets transmitted, 2 received, 0% packet loss, time 999ms
rtt min/avg/max/mdev = 0.112/0.187/0.263/0.076 ms
Инициализировать кластер
На первом узле запустите
sci-setup cluster
Конфигуратор попросит указать адрес кластера в LAN.
root@gnt-1:~# sci-setup cluster
Cluster domain name will be gnt.
Cluster IP will be 10.101.200.10 on the interlink.
We recommend to set it to some unbound LAN IP address,
but it is safe to simply press ENTER.
Set cluster IP [10.101.200.10]:
Если в этот момент укажете свободный статический IP-адрес в LAN, то в дальнейшем сможете обращаться к управляющему модулю кластера по этому IP.
Это удобно, но не не обязательно и не влияет на саму возможность управления. Можно просто нажать ENTER и управляюещму модулю будет назначен адрес во внутренней сети кластера.
Конфигуратор проверит пинг ко второму узлу и попросит принять его ssh-ключ и ввести пароль к нему для получения и проверки параметров конфигурации.
Connecting to Node2 via 10.101.200.12
You will be prompted for a root password...

The authenticity of host '10.101.200.12 (10.101.200.12)' can't be established.
ECDSA key fingerprint is 6a:5a:78:fa:af:c1:23:97:87:9f:66:46:94:7e:f2:f5.
Are you sure you want to continue connecting (yes/no)?
Введите "yes"
root@10.101.200.12's password:
Пароль ко второму узлу.
После успешного прохождения всех проверок, на экране будут показаны параметры конфигурации кластера.
########################################
Parameters detected:
Domain name: example.sci

Master network interface: backbone

Cluster name: gnt
Cluster IP: 10.101.200.10

Node 1 name: gnt-1
Node 1 IP: 10.101.200.11
Node 1 LAN IP: 192.168.11.28

Node 2 name: gnt-2
Node 2 IP: 10.101.200.12
Node 2 LAN IP: 192.168.11.29
Proceed with cluster creation [y/n]?
Если все правильно, введите "y" и нажмите ENTER для создания кластера.
Refilling sci.conf
Creating empty /root/.ssh
Fullfilling /etc/hosts
Fulfilling default /etc/ganeti/networks
Set random vnc password for cluster: miotaigh
add sci repo in apt sources
Initializing cluster
Tuning cluster
Adding the second node
-- WARNING --
Performing this operation is going to replace the ssh daemon keypair
on the target machine (gnt-2.example.sci) with the ones of the current one
and grant full intra-cluster ssh root access to/from it

The authenticity of host 'gnt-2.example.sci (10.101.200.12)' can't be established.
ECDSA key fingerprint is 6a:5a:78:fa:af:c1:23:97:87:9f:66:46:94:7e:f2:f5.
Are you sure you want to continue connecting (yes/no)?
В процессе добавления второго узла в кластер, потребуется еще раз принять ssh ключ и ввести пароль.
Введите "yes" и затем пароль ко второму узлу.
В конце Вы увидите вывод команды диагностики кластера:
VTue Jun 28 18:37:06 2016 * Verifying cluster config
Tue Jun 28 18:37:06 2016 * Verifying cluster certificate files
Tue Jun 28 18:37:06 2016 * Verifying hypervisor parameters
Tue Jun 28 18:37:07 2016 * Verifying all nodes belong to an existing group
Waiting for job 10 ...
Tue Jun 28 18:37:07 2016 * Verifying group 'default'
Tue Jun 28 18:37:08 2016 * Gathering data (2 nodes)
Tue Jun 28 18:37:09 2016 * Gathering disk information (2 nodes)
Tue Jun 28 18:37:09 2016 * Verifying configuration file consistency
Tue Jun 28 18:37:09 2016 * Verifying node status
Tue Jun 28 18:37:09 2016 * Verifying instance status
Tue Jun 28 18:37:10 2016 * Verifying orphan volumes
Tue Jun 28 18:37:10 2016 * Verifying N+1 Memory redundancy
Tue Jun 28 18:37:10 2016 * Other Notes
Tue Jun 28 18:37:10 2016 * Hooks Results
Node              DTotal DFree MTotal MNode MFree Pinst Sinst
gnt-1.example.sci 101.2G 82.2G   3.9G  1.5G  2.4G     0     0
gnt-2.example.sci 101.3G 81.3G   3.9G  1.5G  2.4G     0     0
If all is ok, proceed with sci-setup sci
Создать управляющую виртуальную машину.
На первом узле запустите
sci-setup sci
Если хотите, чтобы внутренний DNS кластера использовал DNS вашей компании как форвардеры (обращался к ним при резолве внешних адресов), то запустите команду следующим образом:
sci-setup sci -d
Без -d внутренний DNS кластера будет резолвить интернет-адреса напрямую через корневые серверы Интернет.
Конфигуратор попросит указать адрес управляющей ВМ в LAN:
root@gnt-1:~# sci-setup sci
Set sci LAN IP or enter "none" and press ENTER:
Укажите свободный статический IP в LAN (в примере: 192.168.11.2).
После успешного прохождения всех проверок, на экране будут показаны параметры конфигурации управляющей ВМ.
Creating service machine sci
IP: 10.101.200.2 on backbone
Second network device: lan
Second network IP: 192.168.11.2
Proceed with sci VM creation [y/n]?
Если все правильно, введите "y" и нажмите ENTER для создания ВМ.
Adding sci to /etc/hosts
Tue Jun 28 18:44:02 2016 * creating instance disks...
Tue Jun 28 18:44:09 2016 adding instance sci to cluster config
Tue Jun 28 18:44:13 2016  - INFO: Waiting for instance sci to sync disks
Tue Jun 28 18:44:13 2016  - INFO: - device disk/0:  2.10% done, 2m 27s remaining (estimated)
Tue Jun 28 18:45:13 2016  - INFO: - device disk/0: 39.90% done, 1m 31s remaining (estimated)
Tue Jun 28 18:46:14 2016  - INFO: - device disk/0: 78.20% done, 34s remaining (estimated)
Tue Jun 28 18:46:48 2016  - INFO: - device disk/0: 100.00% done, 0s remaining (estimated)
Tue Jun 28 18:46:48 2016  - INFO: Instance sci's disks are in sync
Tue Jun 28 18:46:48 2016 * running the instance OS create scripts...
Tue Jun 28 18:49:42 2016 * starting instance...
Поздравляем! В вашем кластере создана первая виртуальная машина!
После запуска, ВМ sci автоматически производит донастройку узлов кластера и становится для них сервером DNS. Операция занимает в среднем 5-10 минут.
Попробуйте команды:
gnt-instance list
gnt-instance info sci
gnt-cluster verify
ssh sci
Операции
Как управлять кластером и создать новые виртуальные машины читайте в разделе ОПЕРАЦИИ
УСТАНОВКА - версия до 2.3 включительно
Custom build ISO-image
How to build your own ISO-image described here: BUILD-ISO (for experienced users, who want to include their own works to the distribution set)
Burn the ISO image
You burn it with your favorite tool (for ex. - k3b).
Create bootable USB flash
At present this option is only available when you build the ISO image yourself.
Consult BUILD-ISO.
Minimal System Requirements
In real case you must choose hardware in according to real objectives.For testing purposes minimal system requierements is:
- 1.2 GB RAM
- 50GB HDD
- 1Gbit ethernet for DRBD link (if you setup 2 or more nodes)
- Hardware Virtualization support: Intel VT or AMD CPU (if you want to run the Windows instances)
Install the system
Install the system on two nodes (you may use only one node, but high
availability capabilities will be unavailable).
The installer will ask you:
- The node's IP-address on the interlink. For ex.: 192.168.2.1(2)
- The network mask. For ex.: 255.255.255.0
- The node's name. For ex.: gnt1(2)
- The domain. For ex.: gnt.yourcompany.com
- The default router's address (DO NOT specify if you use the separate network
card for the interlink!) - The (new) DNS server's address on the interlink. For ex.: 192.168.1.254
- The root password
- Chose one of predefined disk layouts or layout it manually.
- Specify the disks on which yo want to place grub loader. Chose "md0" if you use
the software RAID for the system partition. - Specify the additional kernel parameters (but usually you don't).
Partitioning
During the installation you will be prompted to chose the one of predefined disk layouts
useful for 1-8 disk nodes with or without the hardware RAID.
| Name | Size | Purpose |
|---|---|---|
| / | 10G | Root partition for all node's data |
| swap | 1G | Swap space for Dom0 in calculation of 512Mb RAM |
| xenvg | the rest or the another device | The LVM Volume, named 'xenvg', without any partitions |
The VG "xenvg" will be used as the default place for the instance's volumes.
Also the "system-stuff" volume will be automatically created on xenvg (and mounted as /stuff).
It serves for various big stuff like cdrom images, instance backups etc.
At our own choice you may defer the creation of xenvg during the installation stage and to create it later.
In this case any option with "no LVM" will be useful.
NOTE: If you want to place your own partitions on xenvg, you should
then exclude them from ganeti-managed volumes. (SEE [[SETUP]]).
Simplest way is to name your partitions "sytem-*" because this
pattern is excluded in SCI-CD by default.
You may create more partitions or volume groups at your choice.
DNS server's address
The cluster has it's own DNS server, which is also the 'approx' and
'puppet' server. At the SETUP stage, cluster DNS server can be linked
to other DNS servers in the forwarding mode.
The DNS server's address must not be the address of the existing service.
The cluster's domain name must not be the name of the existing domain if
local domain already exists (use subdomain, or completely different name).
Automatic post-installation changes
During the installation phase, the postinst.sh script from the distro
will apply over 40 system tweaks: POST-INSTALL
The CD installation takes about 15 minutes per node.
The cluster is ready to setup
Read SETUP next.